-min.png)
Custom objects can be powerful in workflows - but only if you set up the right type and triggers.
Many users create a workflow under “Contacts” or “Deals” and wonder why their custom object doesn’t appear as an enrollment option.
Others forget to enable re-enrollment, meaning the workflow only runs once and then never again.
1. Create the Right Workflow Type
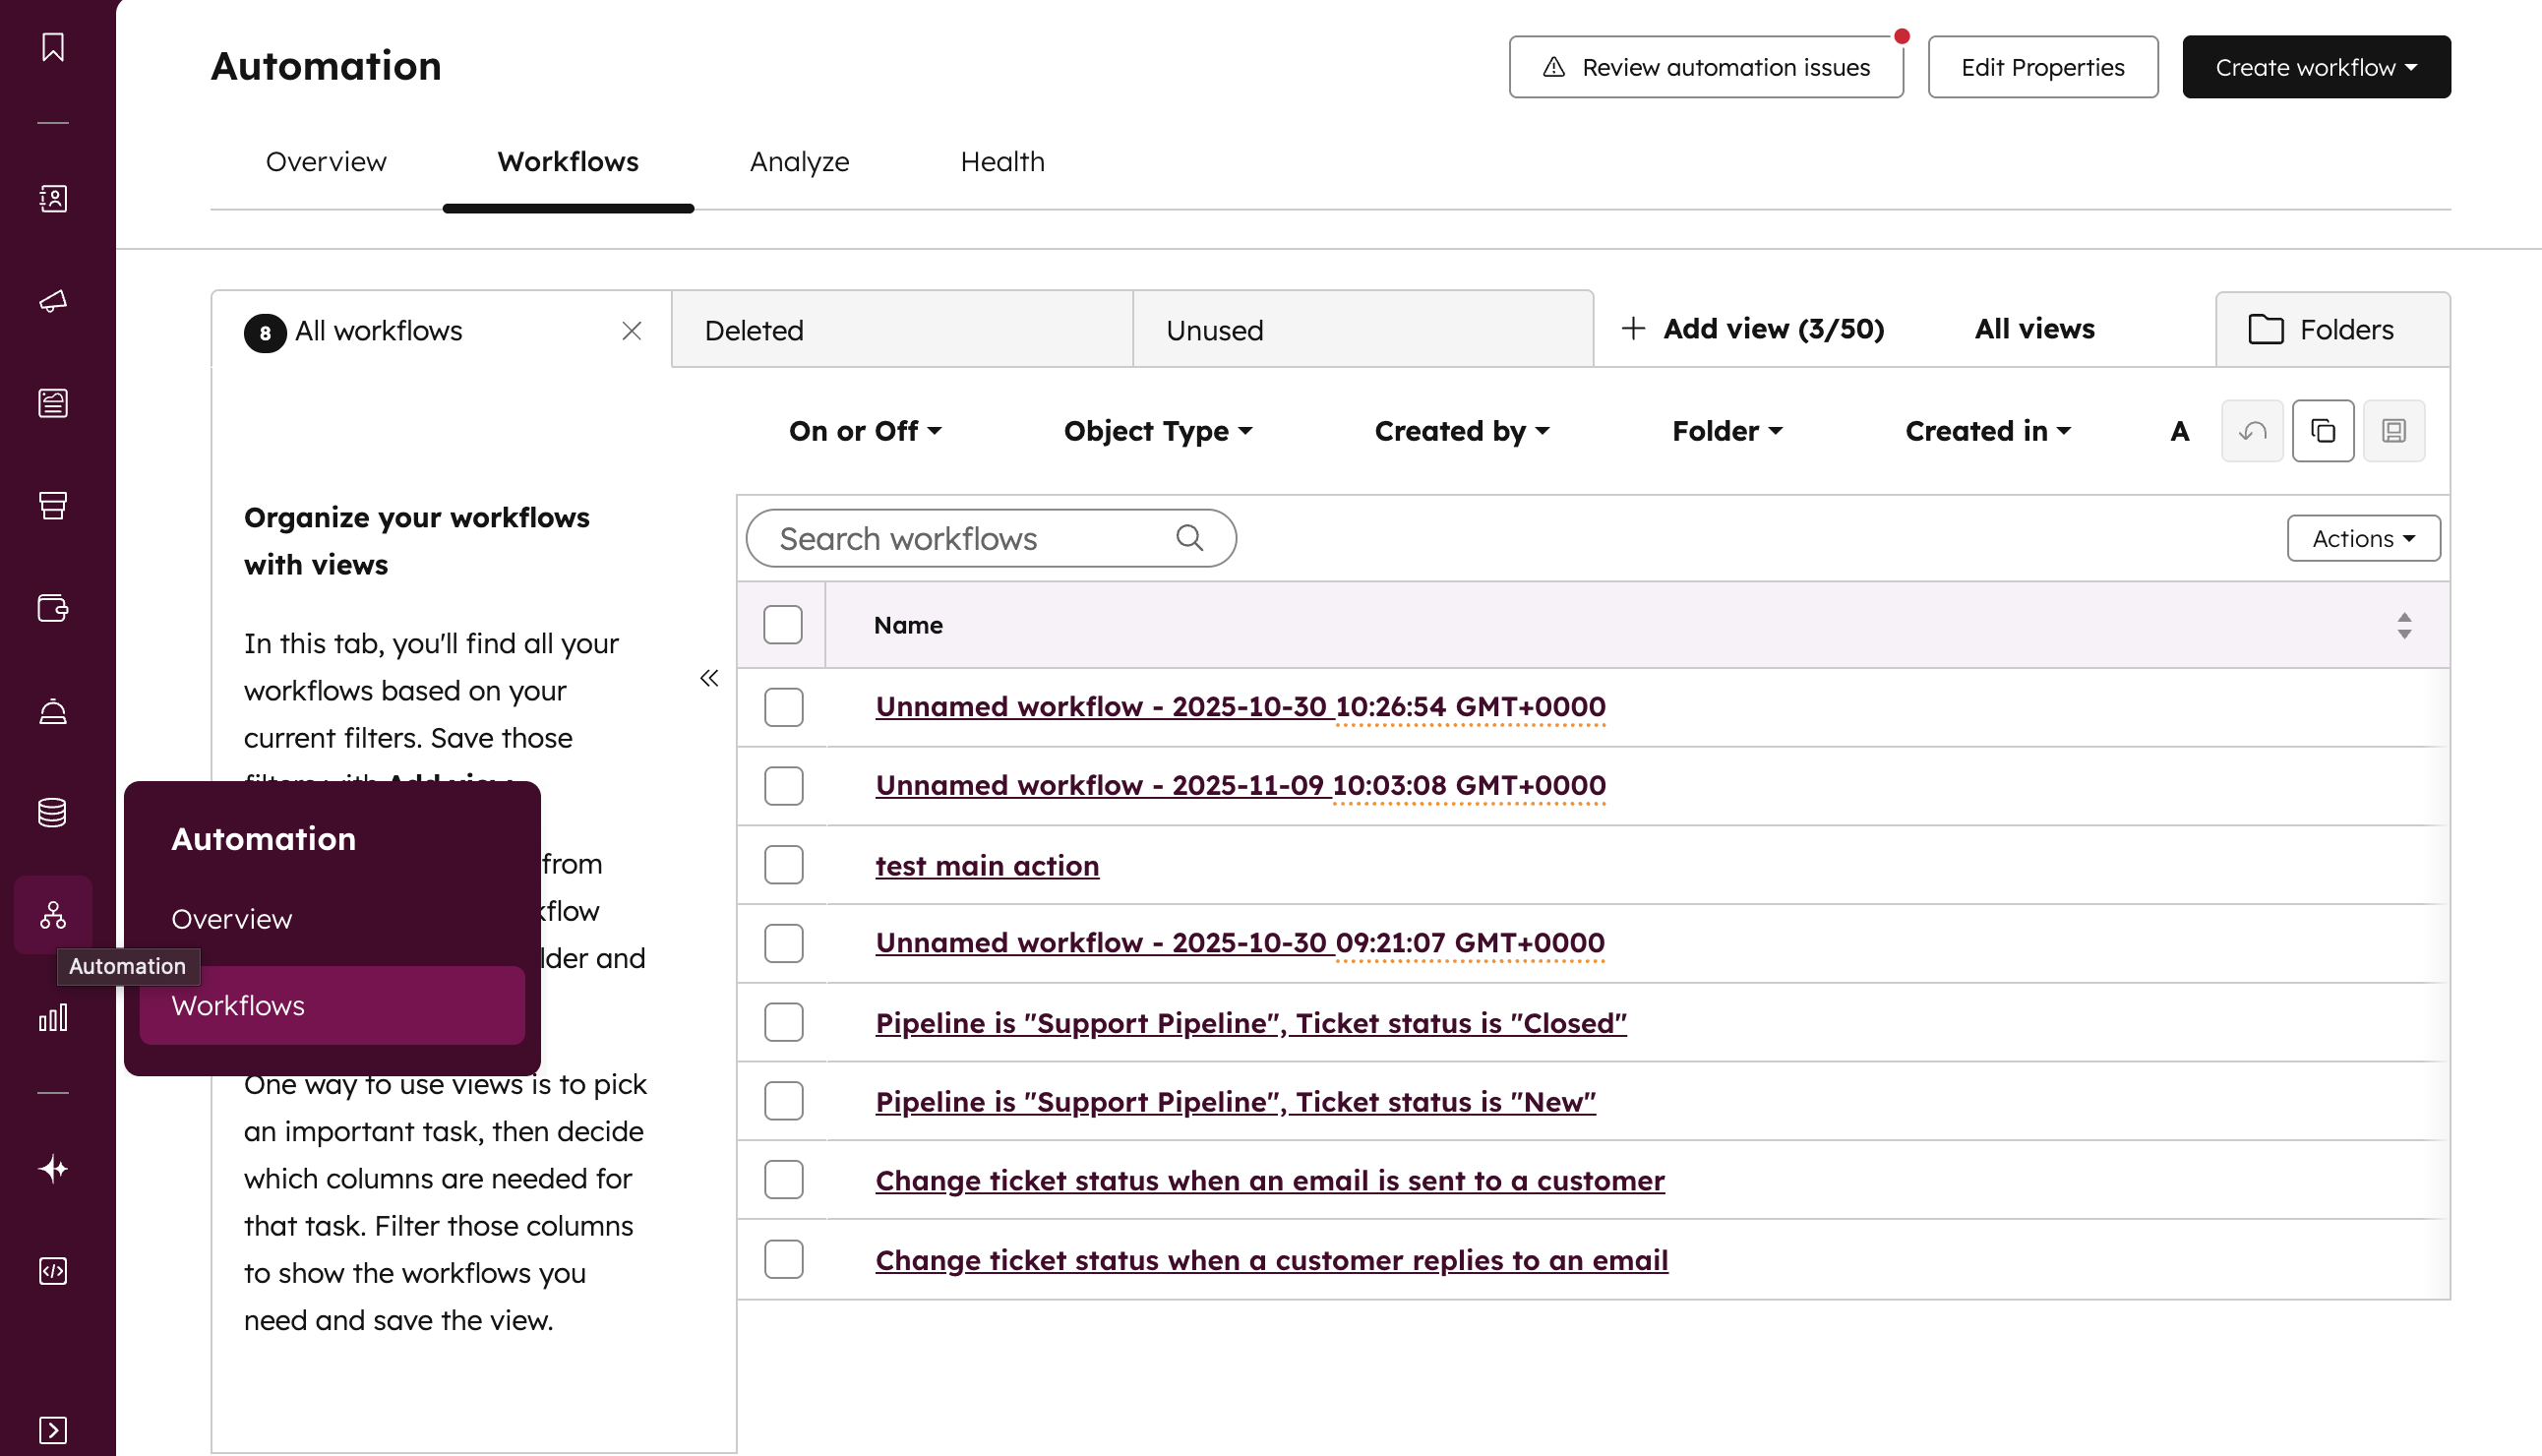
Go to Automation → Workflows → Create workflow → From scratch, then choose your custom object from the list.
If you create it under “Contacts,” HubSpot won’t recognize custom object triggers.

.png)
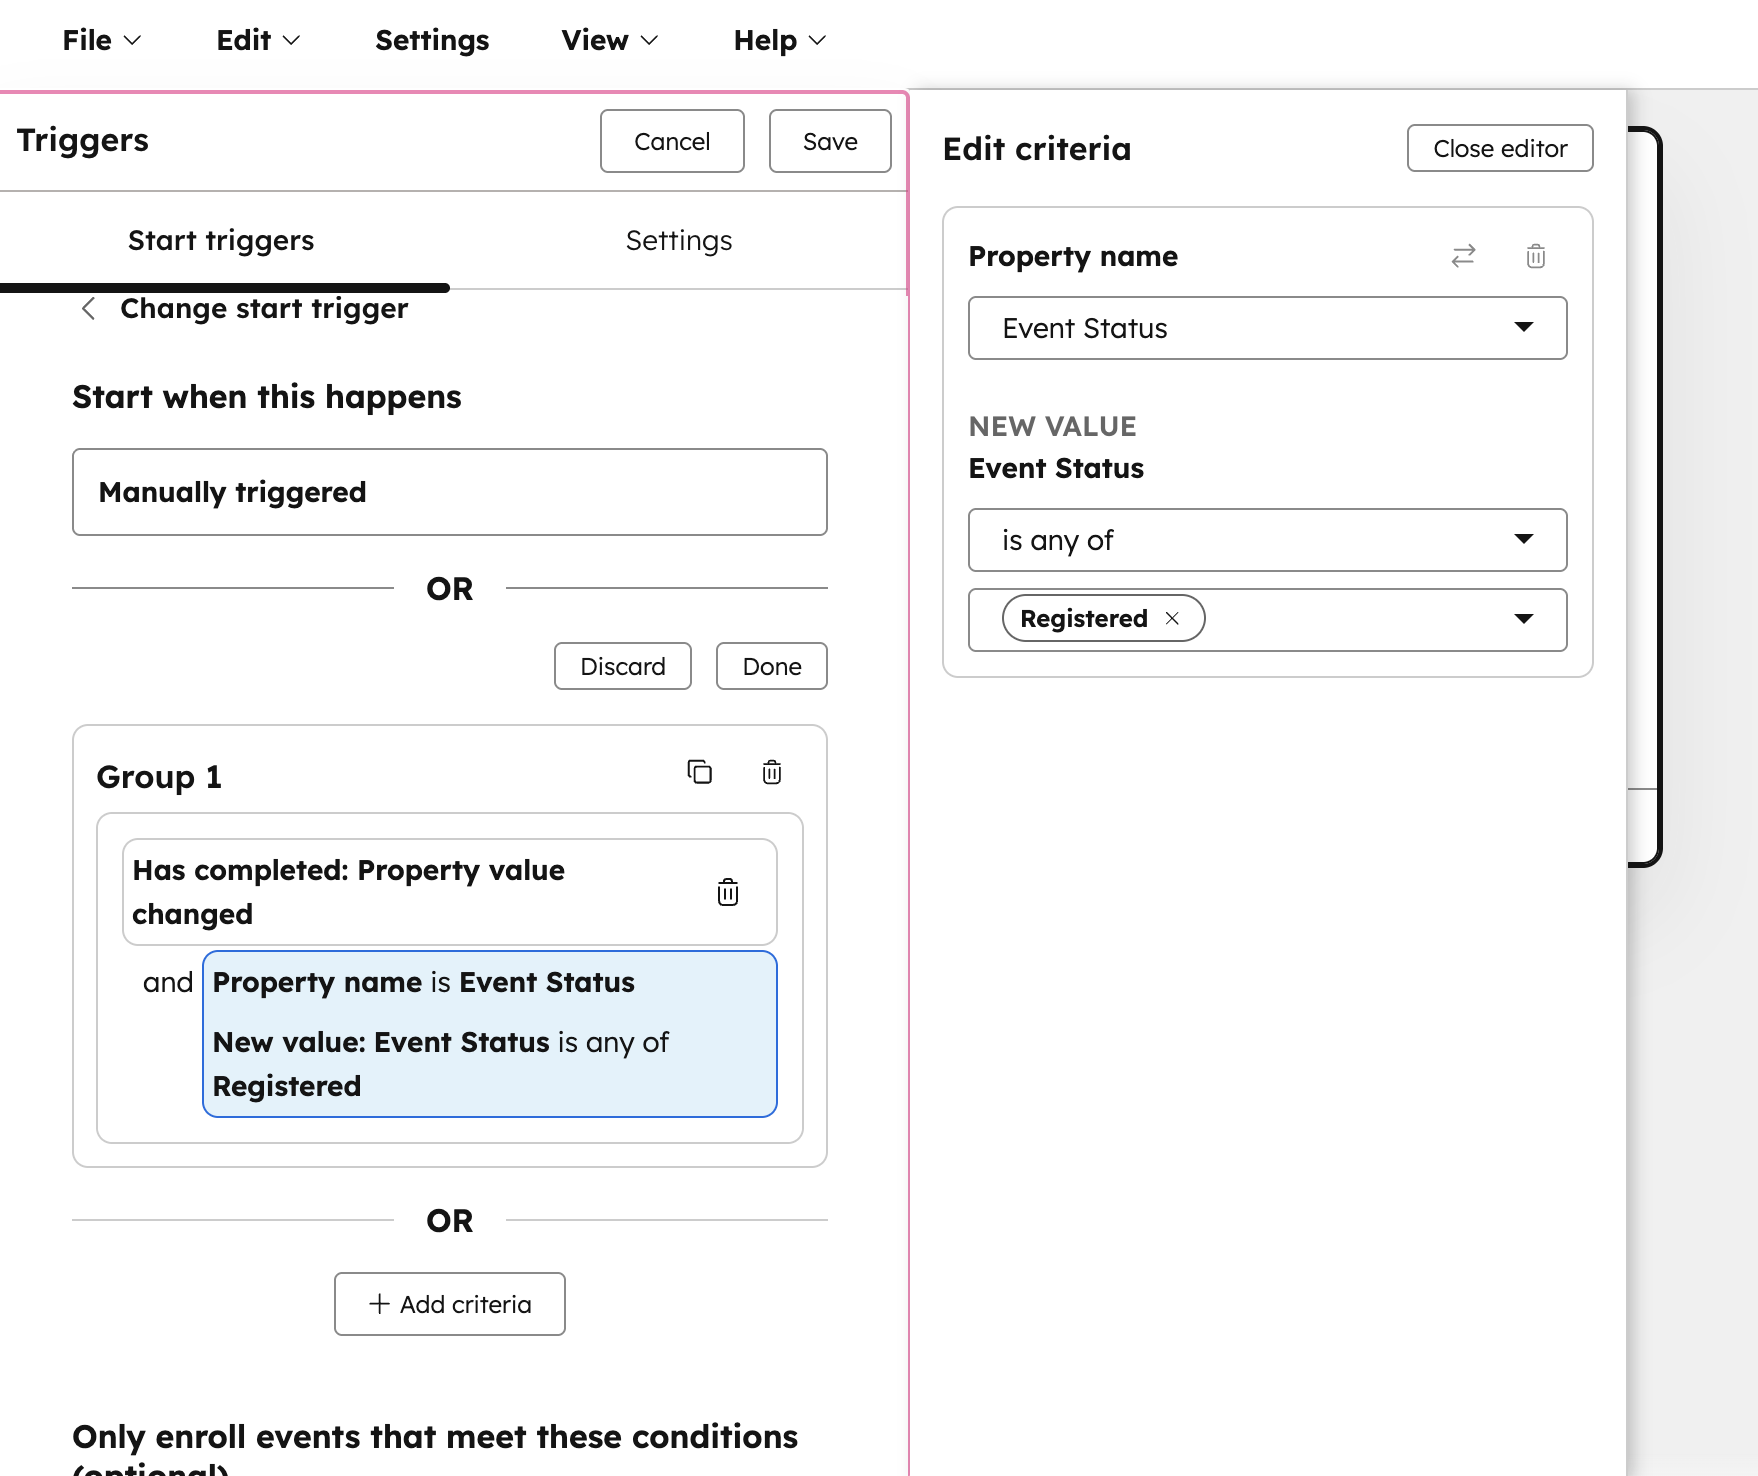
2. Choose the Right Trigger
You can trigger workflows based on property values or changes, such as:

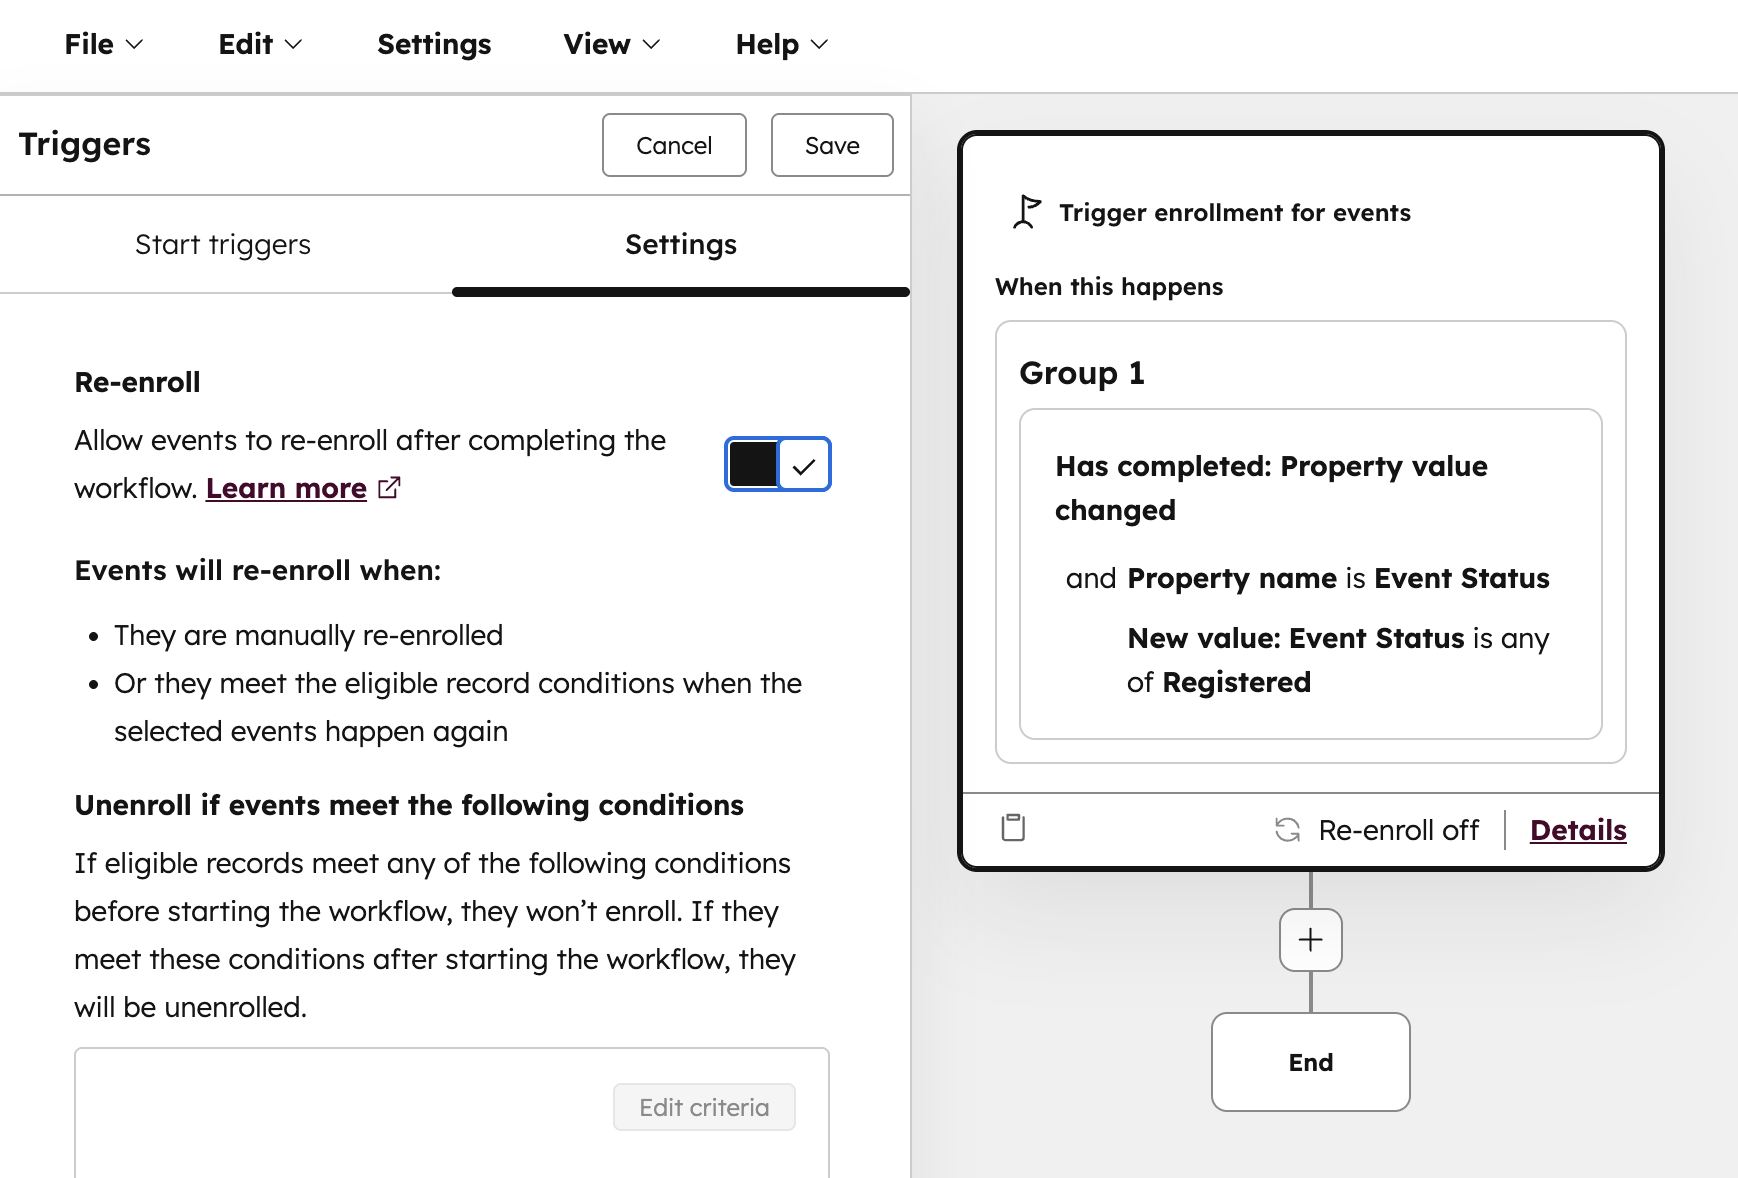
3. Enable Re-enrollment
If your custom object’s property can change multiple times (like an “Event Status” field), enable re-enrollment.
Use conditions such as “Property is known” or “Property changes” so the workflow can run each time an update happens.

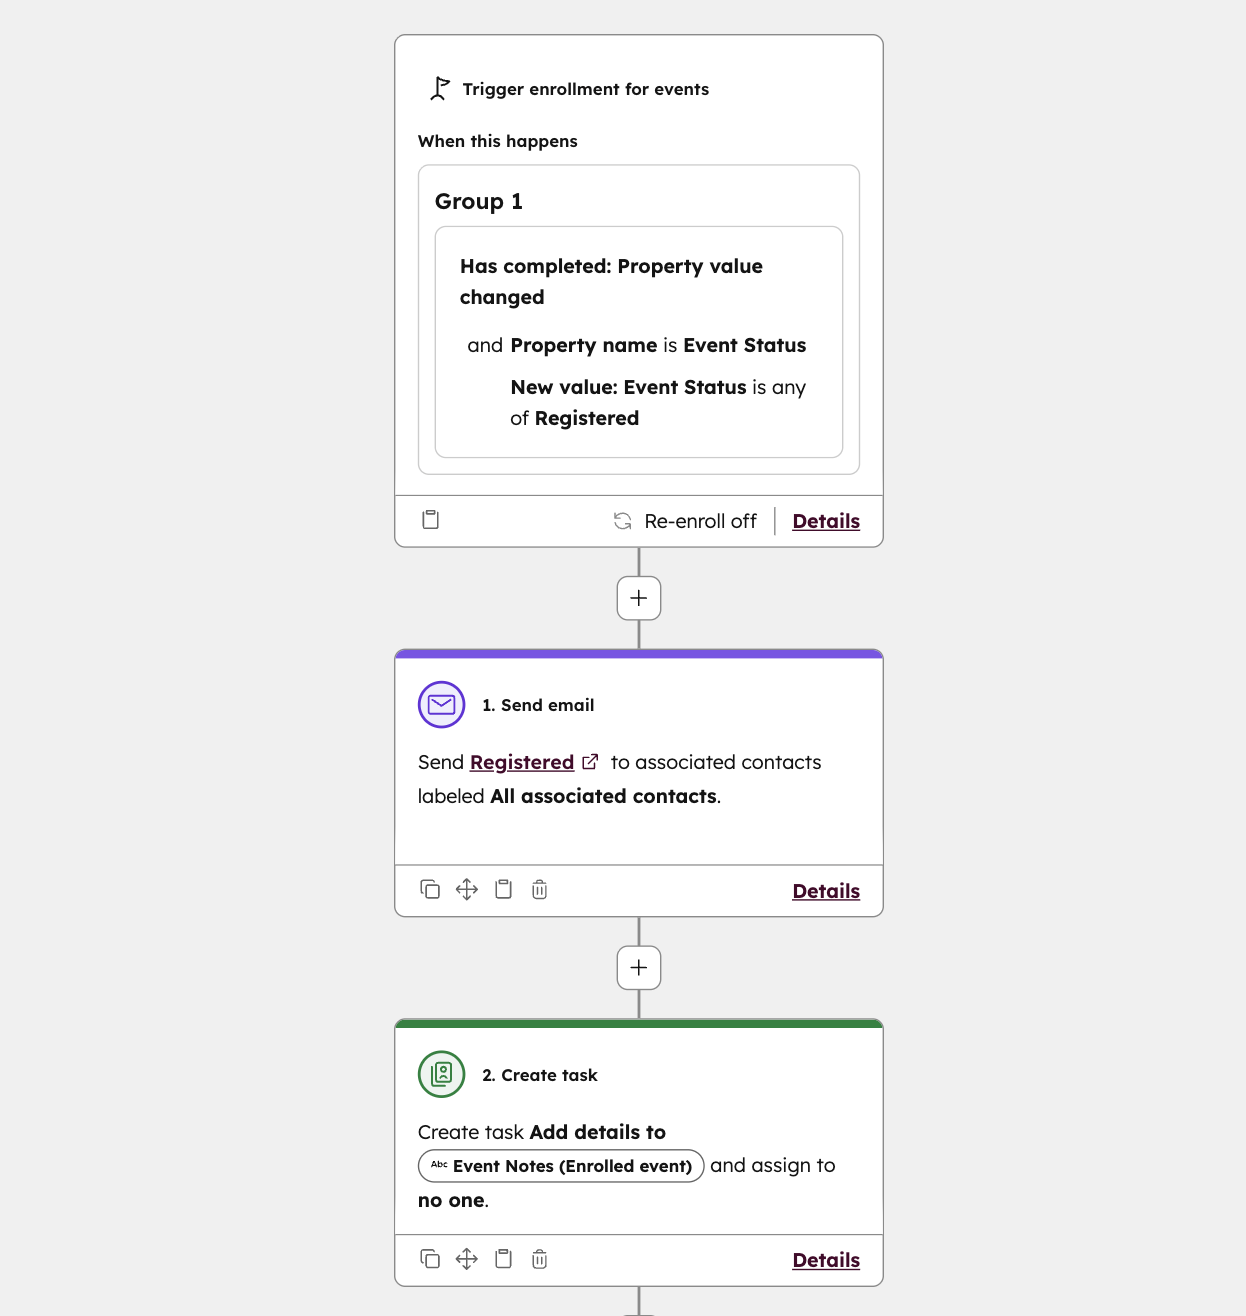
Example Use Case
Let’s say you have a custom object called Event.
You can trigger a workflow when Event Status = Registered, then automatically:
This setup keeps event tracking hands-free and reliable.

Workflows for custom objects aren’t complicated once you know where to start.
The key steps are:
Once configured correctly, your workflows will fire every time - just like standard objects.
